
How To Set Up a Google My Business Listing
Step 1: Create a Google Account

In order to effectively create and manage a Google My Business listing, it is key to have access to a Google account or Google compatible email address. These can be created quickly and easily following the link listed above.
Step 2: Navigate to Google My Business

To begin the process of creating your Google My Business listing go to the Google My Business homepage and click the "Start Now" button. Please ensure that you are signed in with the Google account you wish to assign your new business page to, If not Google will ask you to sign in.
Step 3: Search for Your Property

Once you are signed in you will be directed to the listing creation page in which you will be required to complete your business information. To start, search for your business name and see if your property is already available from the drop down menu which appears. If Google already has information stored about your business, this information will automatically be added to the form.
Step 4: Add Your Business Address & Telephone Number

Fill in the address that your business operates from, This will be the address which will later be confirmed with a postal verification code and be reflected live on Google when customers are searching for your company. Secondly, add the main business telephone number that you would like customers to use to contact your organisation.
Step 5: Select Your Business Category

Categories are used to help customers understand exactly what your business does and how you might be able to solve their needs. When creating your business listing you will need to select your primary business category, which can later be supported by additional categories if your business covers a variety of products or services.
Step 6: Add Your Companies Website Address

In order to help potential customers find out more about your products and services, use this time to add your companies URL to direct users to your websites homepage. This can assist in the organic reach of your brand by further establishing your brand online and creating a useful link that can drive customers to your website.
Step 7: Are You a Service Provider?
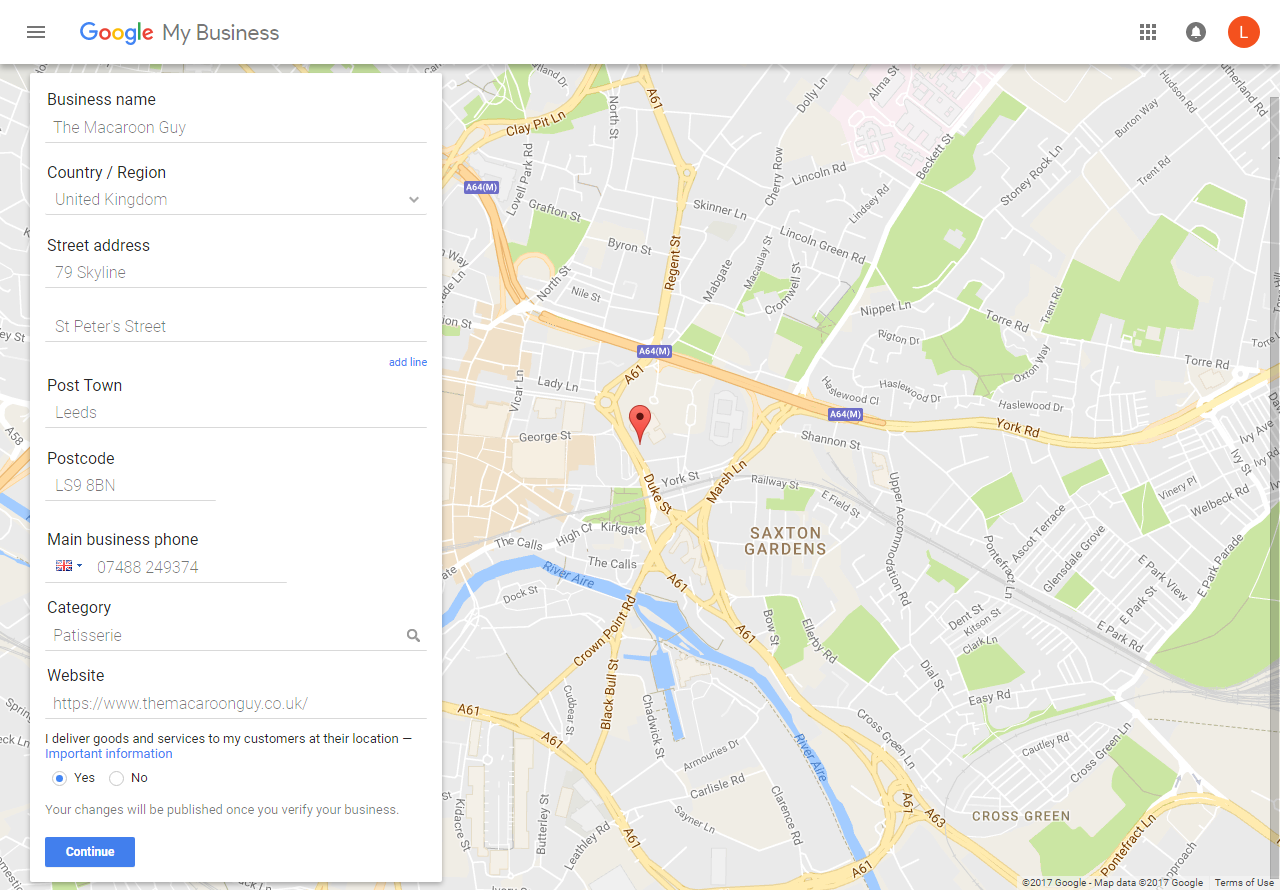
There are two types of businesses that the Google My Business facility caters for; storefront businesses and service provider style businesses. Storefront businesses have a physical location in which customers can visit their premises in order to carry out the sale of goods or services. Service provider business operate their model by visiting customers at their own location and would not expect customers to visit their reigistered business address.
Step 8: Set Your Service Area/Locations (Service Providers Only)

There are two ways to represent service providers on the Google My Business platform with either a service area, or a selection of specifically selected locations. If your business serves within a specific distance from your premises you can set the exact radius in either miles or kilometers. On the other hand, if your have a more targeted area where your customers are based from, you can choose to focus your targeting efforts on these locations individually.
Step 9: Confirm Your Business Details

Once you are happy that all the business information is correct and accuratly represents your organisation, then click the checkbox that confirms that you have authority to create and manage the listing.
Step 10: Verify Your Account

Verification comes in two stages, the first of which being telephone verification. To complete this stage of verification a unique telephone number will need to be added that is not associated to another Google My Business account. The verification can be completed by either a text message or an automated voice call which will provide you with a unique six digit verification code to be entered onto the next screen.
Step 11: Enter Telephone Verification Code

Once you have successfully recieved the telephone verification code, simply add it to the box and click continue.
Step 12: Send Out Verification Post Card
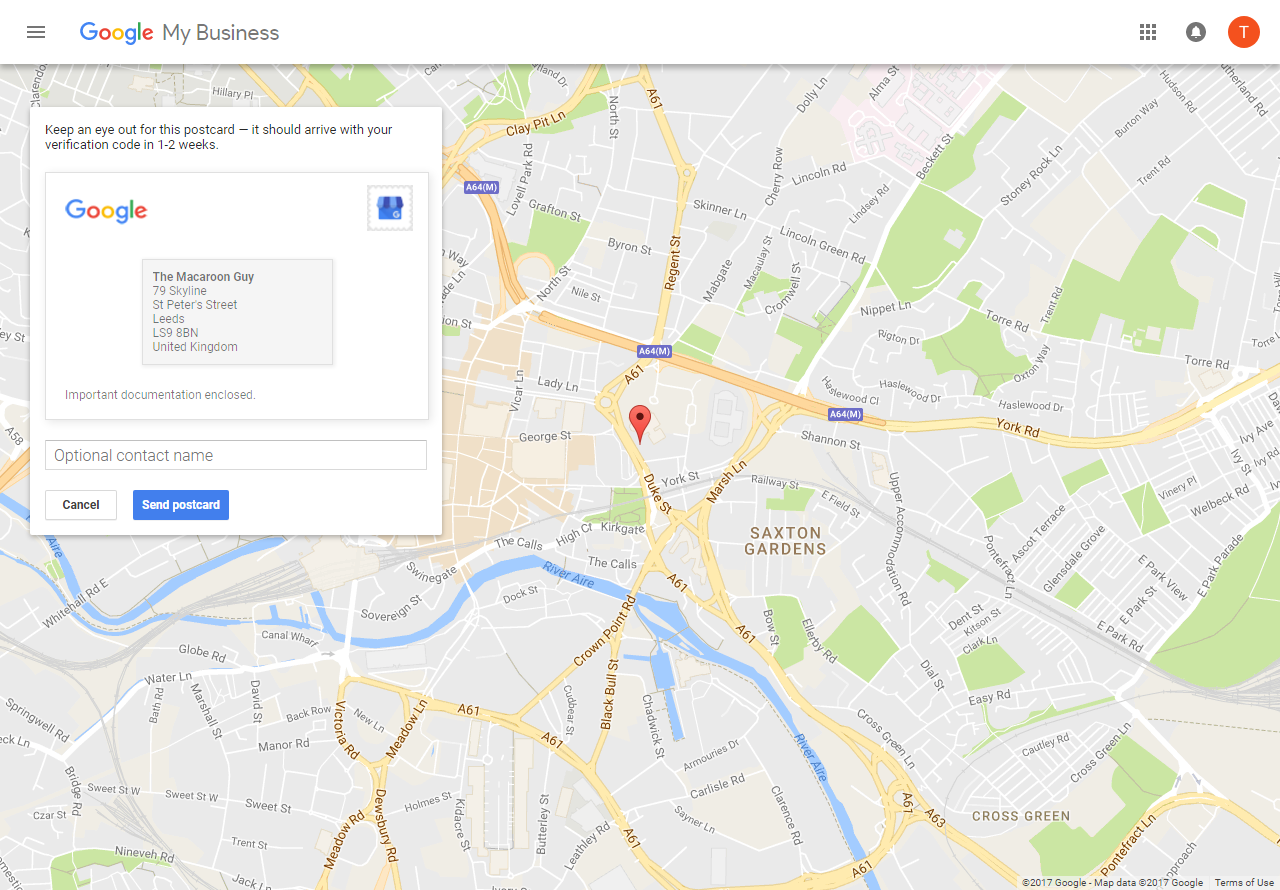
The second stage to the verification process is a postal verification. This will issue a unique five digit verification code to the registered business address which you have previously entered during the registration process. This provides Google with confirmation that your business actually does reside at the address which you have entered,
Step 13: You're All Set

The verification code should be at the registered business address within 3-5 working days and the owner will have up to 30 days to enter this code once issued before it expires.
Step 14: Let the Work Begin!

Once your listing is verified, you're ready to make edits and updates to the page. You can find some useful hints on our resources page